Curly hair comes in all shapes and sizes, from loose waves to tight coils, and each curl is uniquely beautiful. If you've been hiding your curls under heat styling or constant straightening, it's time to set them free and unlock their full potential!
Here's a basic guide to getting started on your journey to embracing your natural curls.

Shampooing and Conditioning:
The foundation of healthy, bouncy curls starts in the shower. When shampooing curly hair, opt for sulfate-free formulas that won't strip away natural oils, which are essential for keeping curls moisturized and defined. Focus the shampoo on your scalp to cleanse away dirt and oil, then let the suds naturally cleanse the rest of your hair as you rinse. You may find a benefit in double cleansing your curly hair, or using a clarifying shampoo once a month to remove product build up that can weigh your curls down. We like to use Matrix’s A Curl Can Dream or Food for Soft shampoos.
Conditioning is key for curly hair. Look for a rich, moisturizing conditioner or a hydrating hair mask to nourish your curls and keep them hydrated. Start with the sides of your hair and back first, then work the crown section. For an extra boost of moisture, consider using a leave-in conditioner or a detangling spray to make combing through your curls easier. We like to use Matrix’s A Curl Can Dream Rich Mask or Food for Soft Conditioner
Styling:
Check out our quick styling video! https://youtube.com/shorts/h1ACDEeY15g?si=3id62kTYIFcBA7zB
When it comes to styling you’ll have to find the right combination and amounts of products that work best for your hair and your preferred outcome. The basic products for styling are:
Curl Cream (like A Curl Can Dream Moisturizing Cream)
Gel or mousse (like A Curl Can Dream Light Hold Styling Gel)
Oil (like Food For Soft oil)
Typically, curl cream and gel is used on wet hair, and foam and spray are applied after you towel dry.
When starting on your curly hair journey you may feel intimidated by gel and mousse and have flashbacks to awkward crunchy middle school hair days. But when applied correctly you’ll be able to achieve soft, touchable curls that last for days!
After you shampoo and condition your hair, section your hair into about 3 sections (maybe 4-5 if you have really thick hair). While still wet rake through a dime sized amount of curl cream to your hair per section. Then apply your gel using the same method. Rub your hands together to evenly distribute the product and then rake it into your hair. Once your product is applied gently scrunch your curls upwards towards your scalp to encourage curl formation. You may find it easier to flip your head upside down to do this. You want to hear a squishy sound when you do this. Scrunch a few times till the excess water is gone, then scrunch again (gently) with a microfiber towel, flour sack cloth, or cotton t-shirt. You’ll want to scrunch slowly and in small sections for bigger more defined curls, working roughly or quickly will often give you smaller less defined curls.
If you are looking for extra volume and hold, apply a quarter sized amount of mousse by gently laying it on top of your curls and then scrunching it. At this point try not to touch your curls too much more.
To provide extra lift around your crown you may want to add little clips to hold your hair up away from your scalp - or you can use a claw clip to lift the hair around your part.
At this point you can choose to air dry or diffuse. If diffusing, use a medium heat on low speed. The key to a successful diffusion is patience. Start by holding the heat around your curls in a still manner - don’t shake your hair dryer like you would with straight hair. Slowly hover around your head until your curls are a bit dryer. Avoid using the diffuser to “scrunch” your ends to your scalp. When air flow is blowing from ends to scalp it will blow open your hair cuticle and make your hair more frizzy. Just hover the dryer slowly above each section of hair.
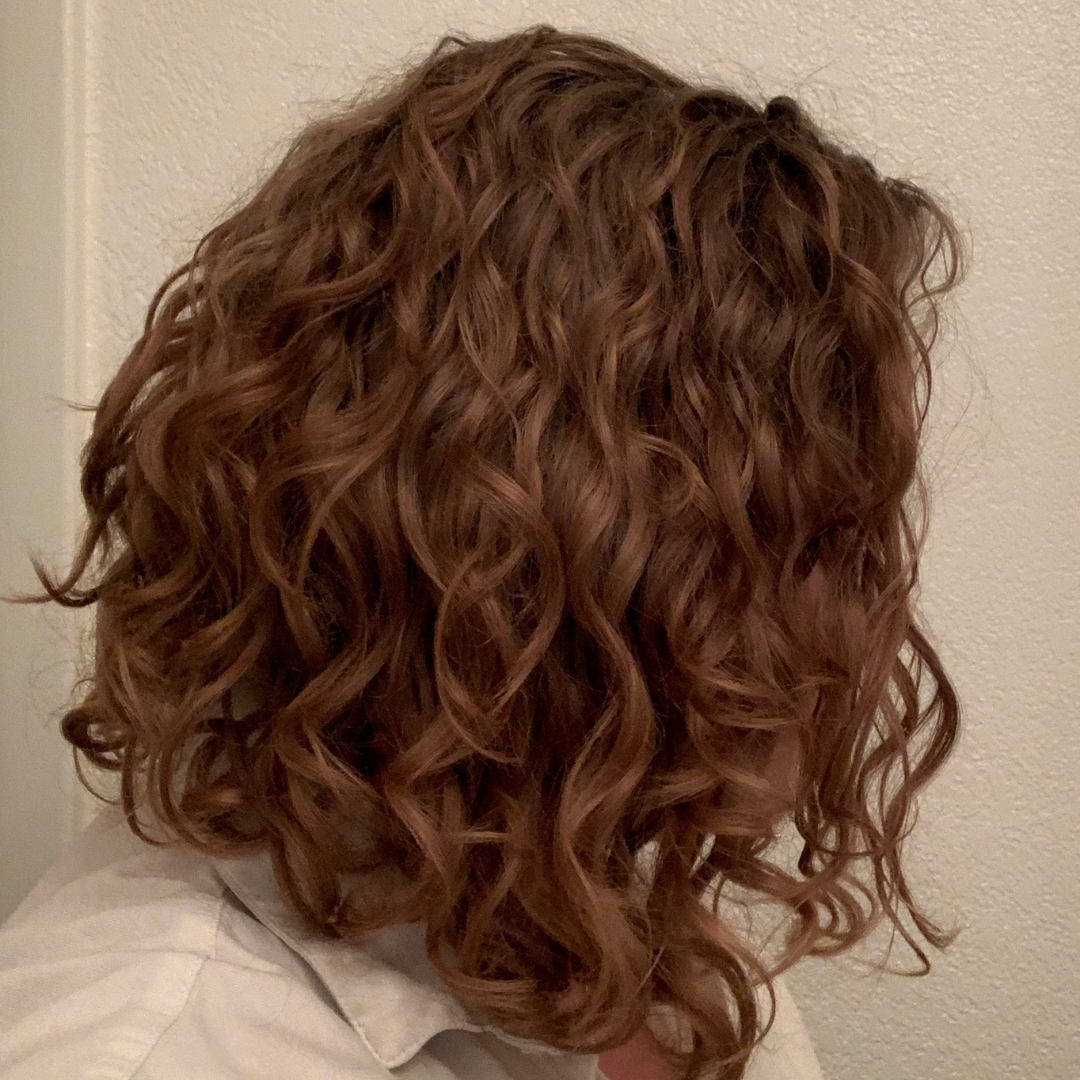
You’ll know you’ve reached a successful styling when your curls have what is called “the cast” that is the crunchy curls that you may have dreaded - but don’t worry! Having a cast on your curls ensures the best outcome and will give you curls for days! Once your hair is completely dry you can break the cast by putting a little bit of hair oil on your hands and gently scrunch and shake out your curls. This will loosen your curls and give you those soft, touchable curls! The better the cast, the longer it lasts!
Refreshing Your Curls:
If you were able to achieve a cast on your curls then refreshing your curls for 2-4 (or more) days will be incredibly easy!
I recommended protective hairstyles while you sleep to ensure you don’t wake up with a completely frizzy mess. A few things you can try are sleeping with your hair in a silk bonnet, using a silk pillowcase, or tying your hair up with the “pineapple method”.
Using a silk bonnet will allow your curls to stay protective and prevent frizz, if you have long hair you may find it easier to use the pineapple method in combo with a bonnet. There are many styles of bonnets out there, so just find what works best for you!
The Pineapple Method consists of flipping your head over and tying it in a VERY loose ponytail at the top of your head where you don’t pull all your hair through on the last loop. Yes, it will look silly. You’ll want to make sure it’s really loose and isn’t pulling any pieces too tightly. It’s also beneficial to use a silk scrunchy so it doesn’t hold your hair too tightly.
In the morning depending on how you want to style your hair and how frizzy it is from sleeping you’ll probably need to spray a little bit of water. You don’t want to get it soaking wet again, just a little damp. If you shake out your curls and most of them look good you can just wet the areas you want to touch up. Somedays you may have to dampen everything. Once it’s damp you can opt for a curl refresh spray, or even put a little bit of your conditioner in your water bottle when you wet it. Then use your microfiber towel or t-shirt again to gently scrunch out the water. If you’re wanting to style your hair be sure to style it when it’s wet before your scrunch.
Getting a Curly Cut:

One of the most important steps in embracing your natural curls is getting a curly haircut. A curly cut is different from a traditional haircut because it takes into account the unique needs of curly hair, such as shrinkage and curl pattern.
During your curly cut appointment, your stylist will assess your curl pattern, face shape, and hair texture to create a customized haircut that enhances your natural curls. They may use techniques such as dry cutting to sculpt your curls and remove any weight or bulk that may be weighing them down.
After your curly cut, be sure to maintain your curls with regular trims every 8-12 weeks to keep your curls looking their best.
Embracing your natural curls is a journey of self-discovery and empowerment. By following these basic tips you can unlock the full potential of your curls and embrace the beauty of your natural hair. So toss aside the straightening iron and let your curls shine!